Oct 25, 2016
Push Notifications on the Web (Building a PWA Crossover)
Recently, Ire Aderinokun has been dropping knowledge on how to build a Progressive Web App with push notifications, local storage and all that good stuff on bitsofco.de. In the third post of the series, she goes over how push notifications were built into the bitsofcode Progressive Web App.
Here’s an excerpt:

In this article, I will cover the second part, the server side. This shall be a simple API built using Ruby on Rails.
The complete code for this tutorial can be found here.
To be able to keep up with this tutorial, you’ll need to have an beginner level grasp of Ruby on Rails and it’s paradigms.
High Level Overview
There are two things our API needs to be able to do:
1. Save Users/Subscribers

When a user opts-in for Push Notifications during the course of using the app, the client-side needs to make a request to our API to save the User’s GCM Sender ID to the database. So that we can send notifications to that user with that ID whenever we want. We need to create endpoints to add and remove Users from our database.
2. Send Notifications to Everyone

IFTTT is a free web-based service that allows users to create chains of simple conditional statements, called “recipes”, which are triggered based on changes to other web services such as Gmail, Facebook, Instagram, and Pinterest. IFTTT is an abbreviation of “If This Then That”.
There’s a very nifty IFTTT recipe that can easily automate stuff like sending out blog post notifications at a particular time.
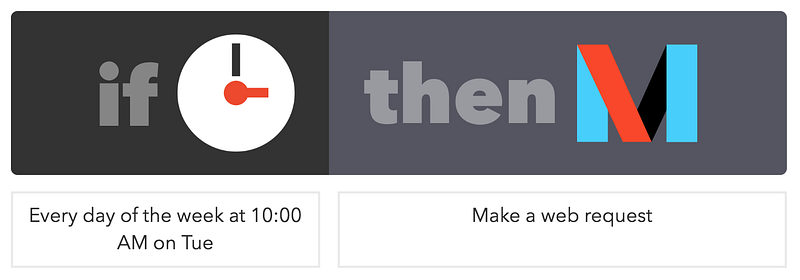
It’s pretty simple; at 10:00AM every week on Tuesday, make a web request to a url. This URL will be our API's /notify endpoint.
What we’re building
Our Rails API is gonna have 3 simple endpoints:
POST /usersto create users.DELETE /users/:idto delete/unsubscribe users.POST /notifyto send notifications to all subscribed users.
Let’s Code
rails new bitsofcode_notify --api
Prelim Setup
Here’s a look at the Gemfile we should start with.
source 'https://rubygems.org'


gem 'rails', '~> 5.0.0', '>= 5.0.0.1'
gem 'puma', '~> 3.0'
gem 'responders', '~> 2.0' #for respond_to and respond_with
gem 'rails_param' #to validate/coerce request parameters
gem 'rack-cors', :require => 'rack/cors' #to set up cors

group :development, :test do
  gem 'byebug', platform: :mri
  gem 'sqlite3'
end

group :development do
  gem 'listen', '~> 3.0.5'
  gem 'spring'
  gem 'spring-watcher-listen', '~> 2.0.0'
end


group :production do
  gem 'pg'
end
The comments beside some of the gems aim to describe what they do. However, I recommend that you go to the github page of each gem for a more in-depth understanding of their functionality.
Also, this is what the ApplicationController should be set up to look like.
class ApplicationController < ActionController::API
  include ActionController::ImplicitRender
  respond_to :json

  rescue_from RailsParam::Param::InvalidParameterError do |exception|
    render json: {errors: exception}, status: 422
  end

end
The code above is simple; it tells our controller to respond to requests that are Content-type: application/json and the rescure_from block simply defines a response for when the request parameters are invalid.
We’re also going to add this to our application.rb
module BitsofcodeNotify
  class Application < Rails::Application
    config.autoload_paths += %W(#{config.root}/app/extensions)
    config.autoload_paths += Dir["#{config.root}/app/extensions/**/"]
    config.api_only = true
  end
end
This is so that any ruby file we put in our extensions folder will be autoloaded.
Finally, CORS
Rails.application.config.middleware.insert_before 0, Rack::Cors do
  allow do
    origins 'https://app.bitsofco.de'

    resource '*',
      headers: :any,
      methods: [:get, :post, :put, :patch, :delete, :options, :head]
  end
end
We want to restrict what origins can make requests to our API. In this case, it’s only the PWA at app.bitsofco.de we’re building that should be able to do that..
Creating and Deleting Users
First we create our User model. For the purpose of this example, it should only have one attribute uid which is where we’ll store the GCM Sender ID of that user.
rails g model User uid:string
rake db:migrate
<.pre>
Then create our UserController.
class UsersController < ApplicationController

  def create
    param! :uid, String, required: true
    @user = User.create(uid: params[:uid])
    render json: @user, status: 201
  end

  def destroy
    param! :id, String, required: true
    @user = User.find_by_uid(params[:id])
    @user.destroy
    head status: 204
  end

end
The code in the controller class is pretty simple. We define two actions:
- A
createaction that takes in auidparameter and creates a newUser. - A
destroyaction that takesid, finds theUserand deletes it from DB.
And route to our controller methods.
Rails.application.routes.draw do
  resources :users, only: [:create, :destroy]
end
If you run rake routes in the terminal, you should have something like this.
users POST   /users(.:format)     users#create
user DELETE /users/:id(.:format) users#destroy
At this point, you can start your app with rails s, fire up Postman to test your API.
Sending Notifications
Firebase Cloud Messaging and Google Cloud Messaging are the same thing. The former is just a new name for the service.
As can be read from the article on bitsofco.de, first thing we need to do is setup a new project with Firebase and get our Firebase Cloud Messaging Sender ID and Server Key. These can be found under Settings > Cloud Messaging in the Firebase project.

We will use the Server Key when posting to Firebase/Google Cloud Messaging via our server.
To to this, we’re going to use the GCM gem. Add gem 'gcm' to your Gemfile and bundle.
Now we’re going to create extensions/gcm_extension.rb and in it, create a GcmExtension class, Singleton style.
require 'gcm'
require 'singleton'


class GcmExtension
  include Singleton

  def initialize
    @client = GCM.new(ENV["GCM_API_KEY"])
  end

  def client
    return @client
  end

end
ENV[“GCM_API_KEY”] is our Server Key from Firebase stored in an environment variable.
We’ll use this extension in our NotificationController.
class NotificationController < ApplicationController

  def notify
    param! :title, String, required: false

    registration_ids= User.all.pluck(:uid)
    options = {
        data: {
            title: params[:title]
        }
    }
    response = GcmExtension.instance.client.send(registration_ids, options)
    render json: response, status: 200
  end
end
The notify action takes a title parameter and sends a notification to all the Users in the database.
To tie it all together, add this route to routes.rb
post '/notify', to: 'notification#notify'
That’s it!
All done.
Again, you can find the complete code for this tutorial on Github here.